How to Choose the Perfect Camera Lens for Bird Watching (UK Guide)
Learn how to choose the perfect camera lens for bird watching with a UK-focused checklist on focal length, zoom vs prime, weight and budget.

How to Choose the Perfect Camera Lens for Bird Watching (UK Guide)
Choosing a bird-watching lens can feel like a minefield: focal lengths that sound similar, prices that jump wildly, and specs that don’t always translate to sharper photos on a blustery UK seawatch. If you’re wondering how to choose the perfect camera lens for bird watching, the fastest route is a simple decision path: (1) work out your typical shooting distance, (2) match focal length to your camera sensor, (3) decide whether a zoom or prime fits how you shoot, and (4) prioritise the few specs that genuinely matter in UK conditions (stabilisation, autofocus, weather resistance and handling). Follow the steps below and you’ll finish with a confident shortlist, not an expensive guess.
Step 1 — Work out your typical birding distance (UK scenarios)
Before you look at brands or price tags, be honest about where you actually watch birds. Distance is the main driver of “reach”, and reach determines how much of the frame a bird fills (and how much you’ll need to crop later). In the UK, the same lens can feel perfect in a garden but frustrating at a reservoir.
Garden feeders & urban parks (close range)
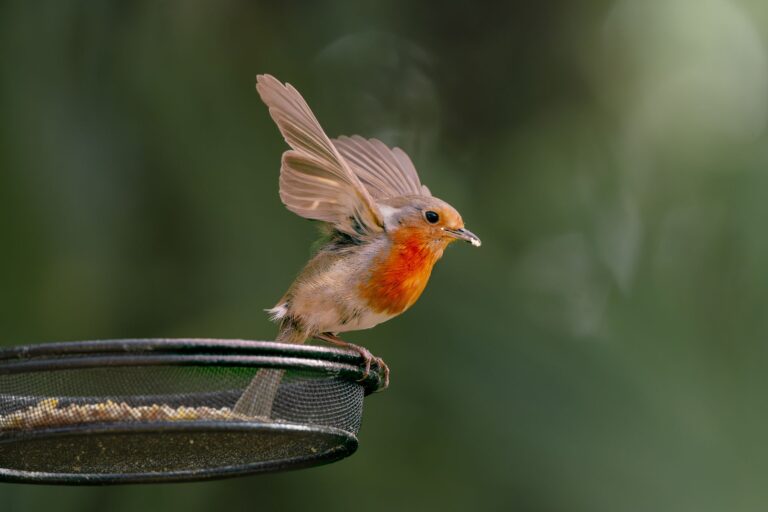
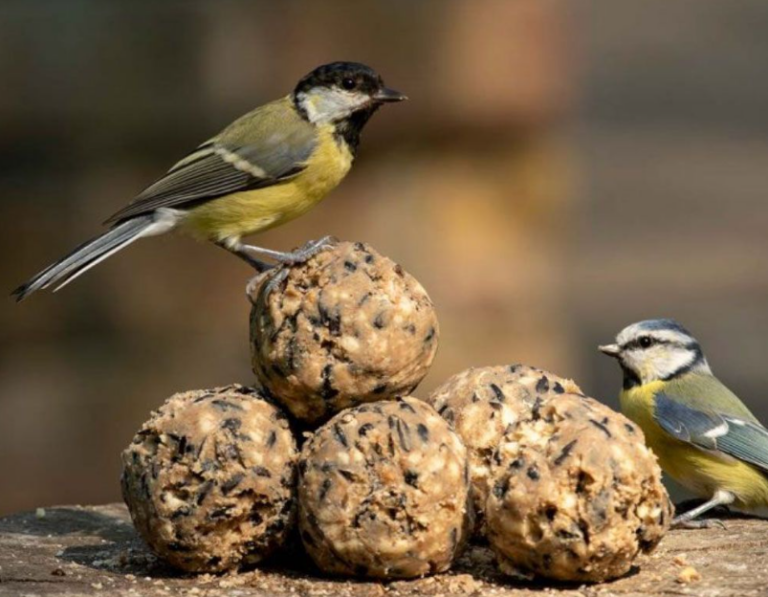
If you mainly photograph garden birds, feeders, or park species that tolerate people (Robins, Great Tits, Moorhens, gulls), you’re often working at relatively short distances. In these situations, an “ultra-long” lens can be awkward: you may struggle to fit the whole bird in frame and you’ll notice every wobble. A 200–300mm lens can be surprisingly effective, with 300–400mm giving you extra flexibility if you’re shooting from inside or across a lawn. Close-range birding is also where a shorter minimum focus distance matters (more on that in Step 4).
Woodland and hides (medium range)
Woodland edges, small lakes, and reserve hides often put birds at medium distances that change quickly: a teal drifts closer, a Sparrowhawk flashes through, a wader lands unexpectedly right in front of you. Here, many birders find a 100–400mm or 150–600mm-style zoom practical because you can reframe fast without swapping lenses in damp air. If your aim is more “portrait” style shots (feather detail, clean backgrounds) you’ll typically appreciate the upper end of those ranges, especially for smaller passerines that rarely come close.
Coastal, estuaries & reservoirs (long range)
Seawatching points, big estuaries, shingle beaches and large reservoirs are where “reach” really matters. Birds can be a long way out, and heat haze or sea mist can limit sharpness regardless of your lens. In general, you’ll be looking at 400–600mm as a realistic starting point for getting frame-filling images of many subjects, with more reach useful for distant waders and divers. If you’re often on exposed coastlines (think Norfolk, Yorkshire, Pembrokeshire), stabilisation and weather resistance become as important as focal length because wind and drizzle can ruin handheld shots.
One reality check: a longer lens can’t replace fieldcraft. Getting closer ethically—using hides, staying low, approaching slowly, and respecting disturbance guidelines—often improves results more than buying another 100mm.
Step 2 — Choose a focal length range that matches your camera sensor (APS‑C vs full-frame)
Two people can use a “300mm” lens and get very different-looking results depending on their camera sensor. The key concept is field of view. APS‑C cameras (often called “crop sensor”) capture a smaller portion of the image circle, so the scene looks more “zoomed in” compared with full-frame.
As a rough guide, APS‑C bodies from Canon are around 1.6× crop, while Nikon/Sony/Fujifilm APS‑C are commonly 1.5×. That means:
- 300mm on APS‑C can feel like roughly 450–480mm field of view compared with full-frame.
- 400mm on APS‑C can feel like roughly 600–640mm field of view.
In practical UK terms, that’s why a keen beginner with an APS‑C starter body can do well with a 300mm lens for garden birds and many reserve situations, whereas a full-frame shooter may want 400mm to get a similar “reach” feel.
However, crop factor isn’t “free magnification”. Image quality still depends on your lens sharpness, autofocus accuracy, shutter speed, and how many pixels your camera has. A high-resolution full-frame file cropped heavily can sometimes match or beat a lower-resolution APS‑C file, but it varies. If you already own an APS‑C camera, don’t assume you must jump straight to 600mm; you may get the results you want with a lighter lens and good technique.
Also check the basics before you shortlist: your camera mount (Canon RF/EF, Nikon Z/F, Sony E, Micro Four Thirds, etc.), whether your body supports in-body stabilisation, and whether it focuses well at smaller maximum apertures (some systems are happier at f/6.3 than others).
Step 3 — Zoom or prime? Pick based on how you actually shoot birds
This is the decision that usually separates an enjoyable day out from a frustrating one. “Perfect” depends on your style: walking vs staying put, mixed species vs single target, and whether you tend to photograph birds in flight or perched.
When zooms win
A zoom is often the most forgiving choice for UK birding because distances change constantly. A 100–400mm or 150–600mm-type lens lets you go from a perched Buzzard to a close fly-by without changing position. Zooms also suit:
- Reserves with varied habitat (woodland edge to open water in one walk).
- Travel by rail or light packing, where one lens needs to cover most situations.
- Hides, where birds may approach closer than expected and you need to zoom out quickly.
The trade-off is that many long zooms have a smaller maximum aperture at the long end (often around f/6.3). In dull UK light, that can push your ISO up or your shutter speed down.
When primes win
A prime telephoto (for example, 300mm, 400mm, 500mm, 600mm) is a more specialist route. Birders choose primes because they often deliver:
- Stronger sharpness and contrast, especially wide open.
- Wider maximum apertures (commonly f/4 or f/5.6), useful in woodland shade and overcast winter days.
- Very reliable autofocus for fast action and birds in flight, depending on the body.
The trade-off is flexibility and cost. A prime can feel restrictive when a bird suddenly comes close, and you may need to physically move (which isn’t always possible on a busy path or in a hide). Many primes are also heavier and are more comfortable on a monopod or tripod.
If you want a straightforward “one-lens solution”, lean zoom. If you regularly shoot early/late, value background blur, and can manage support gear, a prime can be the “buy once, keep for years” option.
Step 4 — The specs that matter most for bird watching (and what to ignore)
Lens listings can overwhelm you with acronyms. For bird photography, a handful of specifications have an outsized impact on keeper rate. Prioritise these, and you’ll avoid paying for features that don’t help your real-world results.
Aperture (f/4, f/5.6, f/6.3) and UK light
Maximum aperture affects how much light the lens lets in. In practice, that influences your shutter speed (critical for freezing movement) and your ISO (noise levels). UK birding often means grey skies, woodland shade, and winter afternoons, so aperture matters.
- f/4: excellent for low light and subject separation, typically larger and pricier.
- f/5.6: a strong middle ground; still bright enough for many action situations.
- f/6.3 (common on long zooms): perfectly usable, but you may rely more on modern high-ISO performance and good stabilisation technique.
Don’t assume you “need” f/4 for birding. If you mostly shoot in good light at reserves and you value portability, an f/5.6–6.3 zoom can be the more practical choice.
Stabilisation (IS/VR/OSS) for handheld UK walks
Optical stabilisation (and/or in-body stabilisation) helps reduce blur from camera shake, especially at long focal lengths. It won’t freeze a flying bird’s wings, but it can make a big difference for perched birds, slower shutter speeds, and handheld shooting in gusty conditions.
If you plan to walk a lot—country parks, canal towpaths, coastal trails—prioritise a lens with effective stabilisation. It can be the difference between a sharp image at 1/500s and a soft one, particularly at 400–600mm.
Autofocus speed + limiter switches
For birds, autofocus responsiveness and accuracy matter as much as lens sharpness. Look for lenses known for strong AF performance on your camera system, and pay attention to useful controls:
- Focus limiter switch: lets you restrict the focus range (e.g., “10m–infinity”), reducing hunting when photographing distant birds on water or in flight.
- AF/MF and custom buttons: helpful when you need to lock focus quickly from a hide window or through reeds.
A lens that focuses confidently in overcast conditions can outperform a theoretically sharper lens that hunts or misses focus.
Minimum focus distance (surprisingly useful)
Minimum focus distance is easy to overlook, but it matters in UK settings where birds can come close: feeders, tame park birds, or a hide with a near perch. A lens that focuses closer can also double as a handy option for dragonflies, butterflies, and larger insects on summer walks, without needing a separate macro lens.
Weather sealing & coatings (drizzle and salt spray)
UK birding doesn’t pause for perfect weather. If you’re often out in drizzle, around muddy paths, or on the coast, weather sealing and front-element coatings can make ownership far less stressful. Weather sealing isn’t a guarantee of waterproofing, but it can help with light rain and spray when paired with sensible care (lens hood, rain cover, wiping down after salt exposure).
What to ignore (or treat as secondary)
- Overblown “macro” claims on telephotos: nice to have, rarely a deciding factor for birds.
- Exotic glass marketing without real-world handling benefits: prioritise known performance and usability.
- Extreme teleconverter plans as your main strategy: they can work, but they add complexity and often reduce autofocus reliability and sharpness if the base lens/body combination isn’t strong.
Step 5 — Handling: weight, support, and the reality of UK birding days
The perfect lens on paper is useless if you hate carrying it. UK birding often involves walking from car parks to hides, standing on sea walls, or doing a full loop of a reserve. Handling directly affects how long you keep the lens to your eye and how steady you are when the moment happens.
As a practical guide:
- Handheld-friendly telephotos are the ones you can lift smoothly and track with for a few minutes at a time without strain.
- Heavier lenses may deliver beautiful results, but you’ll often need support for comfort and consistency.
Support options, in plain terms:
- Handheld: best for flexibility, quick reactions and birds in flight. Stabilisation helps, but your technique matters (tucked elbows, smooth panning, controlled breathing).
- Monopod: a good compromise for long zooms; takes the weight and steadies vertical movement while staying mobile on paths.
- Tripod + gimbal head: ideal for big primes, long sessions at a hide, or seawatching when you’re waiting for action. Bulkier to transport but very stable.
If you travel by public transport to reserves, size matters as much as weight. A lens that fits in a modest rucksack and can be used handheld is often the one you’ll bring more often, which leads to more opportunities and better photos.
Whenever possible, handle the lens before you buy. If that’s not feasible, consider hiring for a weekend at a local reserve: it’s a cost-effective way to confirm weight, balance and autofocus behaviour on your own camera body.
Budget choices: a sensible shortlist by price band (UK-friendly, brand-agnostic)
Prices vary by mount and generation, but you can still use budget bands to narrow your options without falling into the “buy the biggest lens you can afford” trap. Think in terms of the results you need, the weight you’ll carry, and how often you shoot in low light.
Under £500: learn fast, keep it light
At this level, aim for a 70–300mm or similar telephoto zoom that’s compatible with your camera. It’s an excellent way to learn tracking, focusing and exposure without hauling a heavy lens. It suits garden birds, parks, and closer subjects at reserves. If you mostly photograph larger birds (swans, geese, herons) and you’re happy with environmental shots rather than tight portraits, this can be enough.
Tip: buying used from a reputable dealer can be the difference between a basic kit upgrade and a genuinely capable telephoto.
£500–£1,200: the versatile UK “all-rounder” zone
This is where many birders find their sweet spot. Look for a 100–400mm style zoom, or a longer 150–600mm style zoom if you spend lots of time on open water and coasts. You’re paying for better sharpness, stabilisation, and autofocus behaviour, plus more reach for small birds that won’t let you close.
Choose 100–400mm if you walk a lot, shoot mixed wildlife, or want a lens that’s easier to handle in woodland and hides. Choose 150–600mm if you regularly feel “too short” at reservoirs and estuaries and you’re comfortable with a larger lens.
£1,200–£2,500: enthusiast performance without full “big prime” commitment
In this band you’ll often find higher-performing long zooms and lighter primes, depending on the system. If you want more consistent sharpness at the long end, stronger build quality, and autofocus that keeps up with action, this is a sensible place to shop. For many UK bird photographers, this tier is about raising keeper rate: more shots sharp, more shots correctly focused, more usable images in dull weather.
If you’re considering a teleconverter, this is also where it becomes more realistic—provided your camera body focuses well at the resulting aperture and you accept the handling trade-offs.
£2,500+: specialist primes for dedicated bird photography
This is the territory of 400mm/500mm/600mm primes and top-tier zooms. They’re built for performance: fast autofocus, strong sharpness, better low-light flexibility, and robust construction. They also demand more from you: thoughtful support gear, careful transport, and a clear idea of your target species and locations.
If you’re frequently photographing distant subjects (waders on estuaries, raptors across valleys, offshore seabirds) and you can commit to carrying and supporting the lens, this is where “perfect” starts to mean “no compromises”. If you’re still exploring what you enjoy shooting, hiring first can prevent an expensive mismatch.
Common mistakes when choosing a bird-watching lens (and how to avoid them)
- Buying the longest lens and leaving it at home: if it’s too heavy, you won’t carry it. Choose what you’ll actually use on a normal UK day out.
- Ignoring stabilisation: for handheld birding, good stabilisation often improves results more than a small jump in focal length.
- Forgetting mount and autofocus compatibility: always check the lens mount, whether adapters affect autofocus, and whether your camera performs well at f/6.3 or with teleconverters.
- Expecting teleconverters to solve everything: they can be useful, but they reduce light and may reduce autofocus reliability—especially in overcast weather.
- Overlooking UK conditions: coastal salt, drizzle, and wind are real. A hood, a simple rain cover, and a lens with decent sealing can save a lot of frustration.
Quick decision checklist + next steps
- Where do you shoot most? Garden/park (200–400mm), reserve/woodland/hides (300–500mm), coast/estuaries/reservoirs (400–600mm).
- What sensor do you use? APS‑C often needs less absolute focal length than full-frame for the same field of view.
- Zoom or prime? Zoom for flexibility and mixed distances; prime for low light, subject separation and action performance.
- Prioritise real-world specs: stabilisation, autofocus behaviour, minimum focus distance, and weather resistance.
- Be honest